
If you’re a reseller and want to make a higher profit for some old Levi’s jeans you found at the thrift store or if you just have some old jeans in your closet that you’d like to turn into shorts, this post is for you!
I’ll be walking you through the step-by-step instructions, that are insanely easy, to make the cutest cutoff shorts! You can also do this if you’d like to hem your too-long-for-you jeans or would like to add some holes to your plain jeans.
Let’s jump right into it!
What you’ll need:
- Pair of jeans
- Good scissors
- Measuring tape
- Tweezers
- Podcast, audible, music, or Netflix (optional)

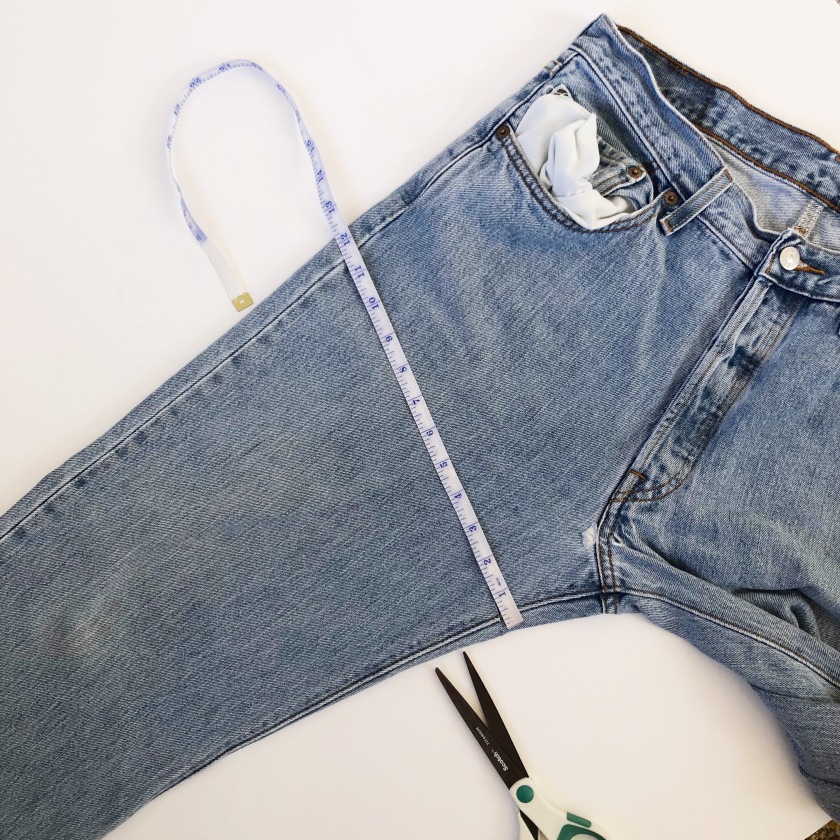
Step 1:
Measure the Inseam of the jeans to determine where you’d like to cut.

Typically shorts will have an inseam anywhere between 1.5 inches to 4 inches long. The best rule of thumb when cutting jeans you’re about to distress, is to cut at least half an inch longer than you want them to be.
Step 2.
Cut your jeans into shorts! Yup, we’re already here.
If you’d like to cut your jeans into those super sexy, vintage looking shorts (which I went with for this example, unintentionally), you’ll want to cut up from the inside seam, to the outside seam of the jeans. If you want a longer, but still super cute look, maybe a more baggy boyfriend jean cut, you’ll want to cut straight across from one side to the other. & hey, if you want to get real creative, cut going down and add a slit on the outside seams.
For me personally, I’ll fold the legs ontop of each other to cut the other leg. You could always just measure the other leg like you did the first one. If you have really amazing scissors, you could probably just cut them at the same exact time.
Step 3.
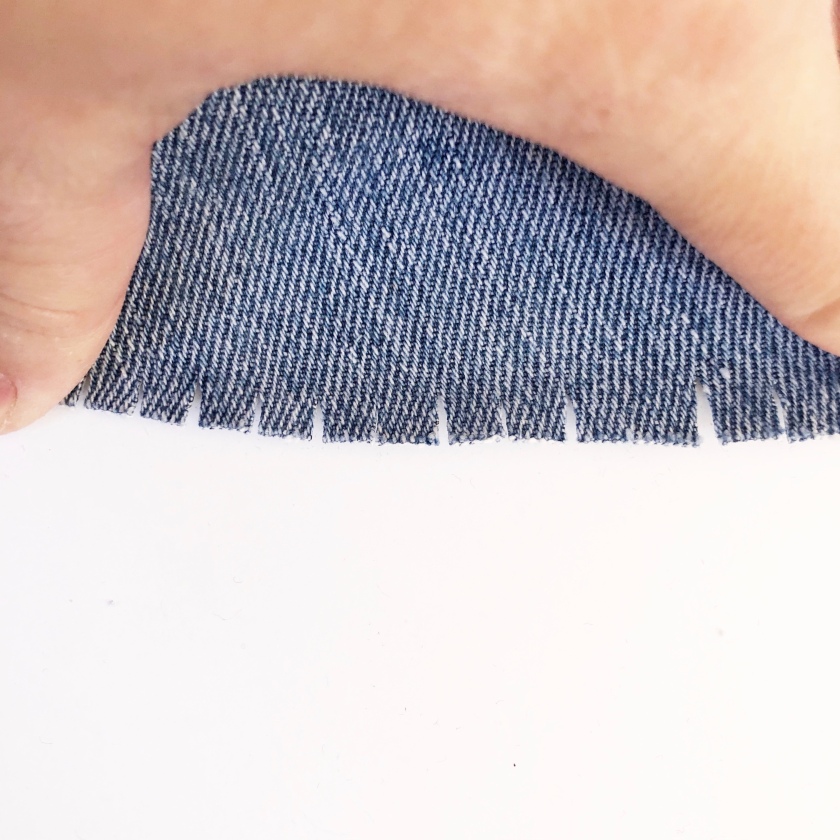
It’s time to start distressing the hem!

First, you’ll make multiple cuts into the hem perpendicularly, about 1 centimeter apart from another. The closer the cuts are, the easier the next steps will be.
Note: Depending on how short you want these shorts to be, you’ll determine how much to cut into the hem. I went pretty short with these, so I didn’t go too far into the hem. The great thing about it though, is that you can always cut further later. It will just be double the work!
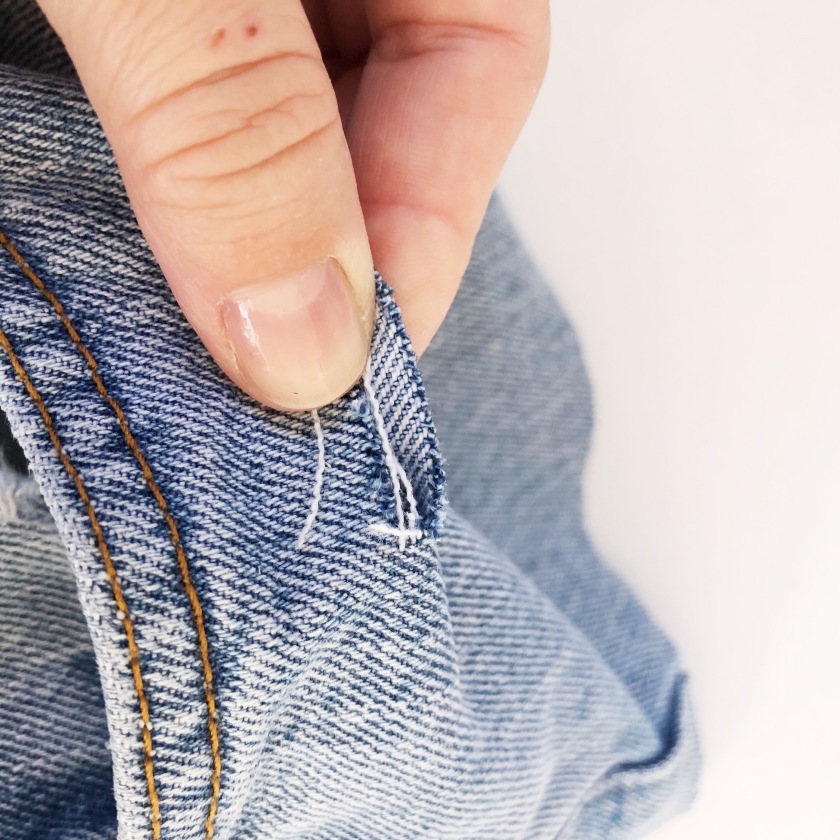
Next, you’ll flip the denim over to see the inside of the denim and grab your tweezers! You want to do this, because it’s much easier to see the pattern of the denim.


The white fabric is horizontal, while the blue fabric is vertical. You’ll be using the tweezers to help you pull out the WHITE pieces of fabric. Your other hand will help you pinch and hold the flabs of denim, as you pull the white fabric out with the tweezers.
Note: This is super messy! Small pieces of denim will be everywhere, so make sure you’re in a place that you’re okay with this happening!

For reference, this is what the frayed hem will look like on the outside. As you can see, I went really small, so if you cut more into it, you’ll have a more frayed look.
You’ll repeat this step ALL along the hems, front and back. It is tedious work, but it can be therapeutic! This will be the longest part of this project, so turn on some background noise like your favorite podcast or a Netflix show you’ve seen a million times.

This is how mine turned out. Again, I cut really, really short, so I didn’t want as much to be frayed. Once you get the hang of it, you’ll find different ways to cut and fray, so yours will come out unique to you.
Step 4. (Optional)
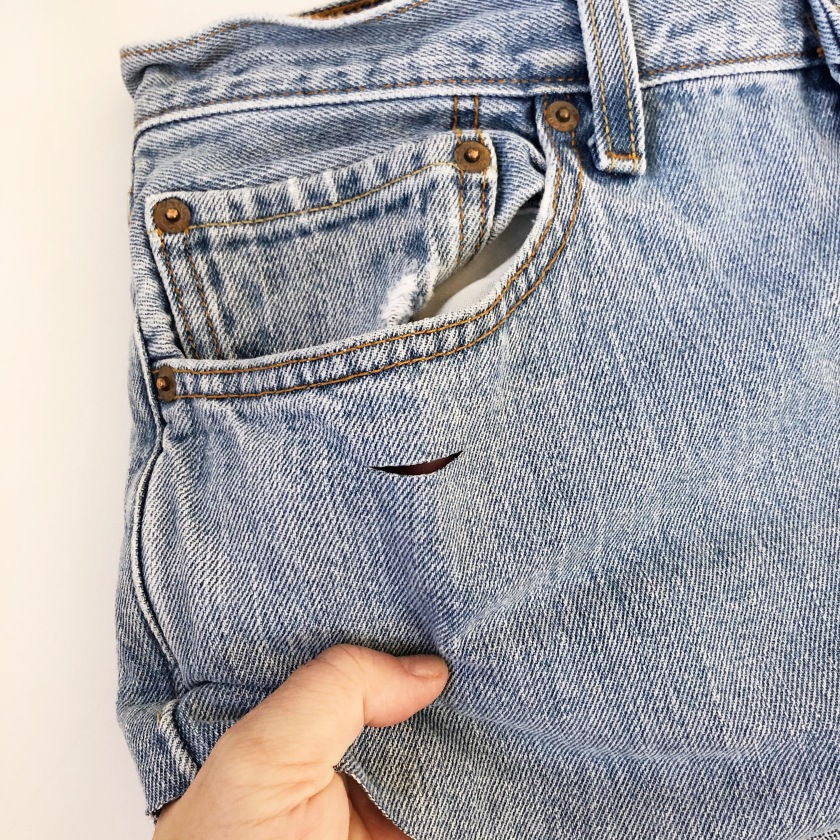
I love to add a bit more character to my cutoff shorts by distressing some additional holes over the front and back pockets. I’ll show you two different styles now!


The first one is a smaller hole, photo’d above, on the left.
First, you’ll pinch the fabric like this:

Then cut into it. Up to you how far you cut. The more you cut, the bigger the hole.

Like before, you’ll flip it to see the inside, so the pattern is visible.
The goal is to fray the edges of the hole, following the instructions above, AND to pull out the white pieces so that they horizontally fill the hole.

Use your tweezers to help with this! I’m showing it to you here, on the outside, so you can see what I mean, but again, I usually do it on the inside to better see the pattern.
Here’s what it could look like:

The second option is a larger hole. It’s the same steps, except you’ll just make the hole… you guessed it, bigger! lol.
Again, pinch and cut into the fabric, the length and amount that you want the hole to be. The additional step is to make the hole larger, by cutting a square out like this:

From there, follow the instructions provided above.

Here’s what this hole could look like:

Extra tip! While distressing your cutoffs, you’ll notice that the white pieces of the denim are really tight and not frayed like you typically see in other cutoffs. You can distress it in a number of ways, like throwing them in the wash or using sandpaper, but my impatient self likes a quicker way.
Grab your scissors and run the blade across the white pieces of fabric.

Be very careful with this though. As you can image, it could completely cut them off, but if you’re gentle, it only takes a little bit to fray them.
& That’s it!


Super simple and customizable to make it your own. Make sure to leave some feedback in the comments, I’d love to learn more ways to distress denim AND to hear about your experience trying it out!
Thanks for being here. 🙂

I’m going to try this technique with some levi’s I have to make cropped pants! Great tutorial! 💕
LikeLike
Oh my goodness! Just saw this comment-so sorry. Still getting used to having my blog going again. lol. Thanks for checking it out! 🙂
LikeLike